Symptom:
The memory module is faulty, or you've received instructions from HQ to replace the memory module and are unsure how to proceed.
Solution:
- Remove the controller from the enclosure.
For dual-controller systems, first identify the controller with the faulty memory module. - Remove the super capacitor from the controller.
Refer to “Replacing the Super Capacitor” for detailed instructions.
IMPORTANT:- Ensure to follow this step to prevent the super capacitor from emitting electricity, which could damage the DIMMs and host boards.
- Alternatively, wait at least 30 seconds after the 7-segment LED in the controller turns OFF.
- Locate the DIMM slots in the controller.
Refer to each model’s “hardware manual” for precise location information. The example below may vary by model.
IMPORTANT: When installing memory modules, fill the CH0 DIMM1 and CH3 DIMM1 slots first.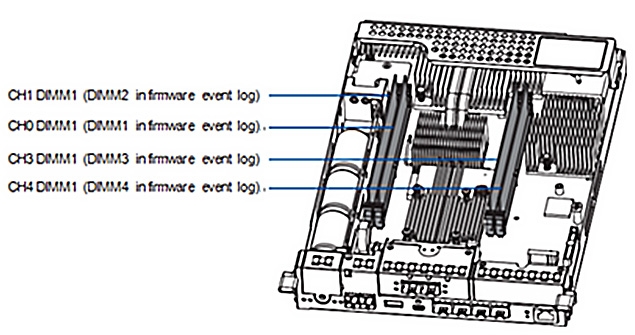
- Remove the faulty DIMM.
Push down the clips to release the DRAM module from the DIMM socket.
- Install the replacement DIMM.
Carefully insert the replacement DIMM into the socket, ensuring the DIMM’s notch aligns with the notch guide on the socket.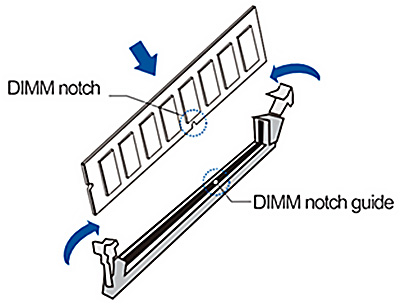
- Reinstall the controller into the enclosure.