Các câu hỏi thường gặp
How do I set the IP address manually in console mode?
To manually set up the IP address:
- Turn on the GS system and wait until it is ready.
- For GS and GSe, wait for about 15 minutes.
- For GSe Pro, wait for about 10 minutes.
- Connect the console to your PC.
- Open the terminal software, such as PuTTY.
- Set up the parameters.
- From PuTTY configuration screen, click Session, then select Serial under Connection type.
- Check the Serial line field for your PC's COM port.
- Type 38400 in Speed field.
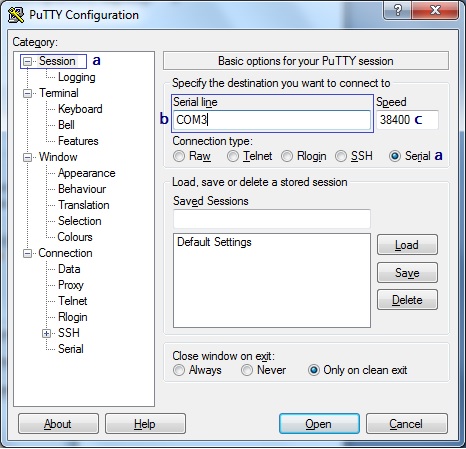
- Click Open.
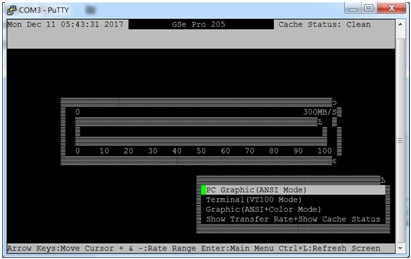
- Press Ctrl + L keys to display the console interface.
- Press Enter key, then type the default password (admin) to log in.

- Select View and edit Configuration parameters, then press Enter.
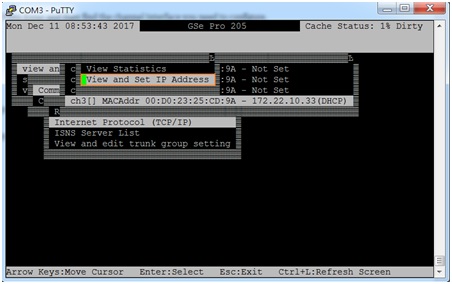
- Select Communication parameters, then press Enter key.
- Select Internet Protocol (TCP/IP), then press Enter key.

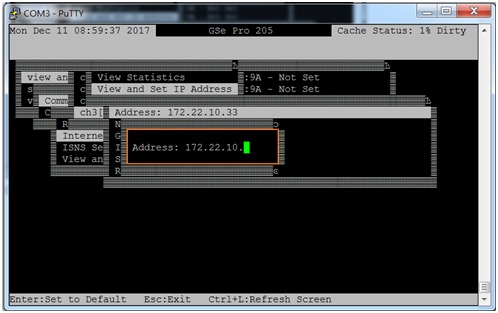
- Find the channel interface that you need to configure, then press Enter.
- Not set message means there is no cable connected.
- For item ch3, check of the following cases:
- The IP shown is from the router
- The channel interface is under DHCP but doesn't get specific IP. IP will be set to 10.10.1.1
- A specific IP set previously by other users
- Select View and set IP address then press Enter to display the current IP configuration.
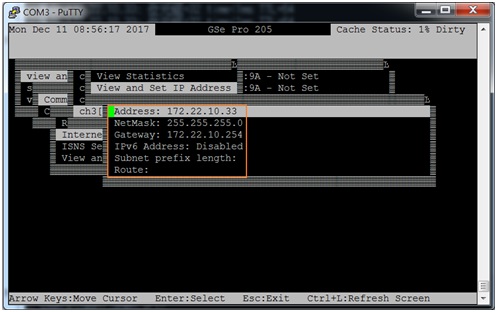
- Press Enter to configure the IP address:
- If you enter your configuration in DHCP, the IP is DHCP.
- If you type a specific IP, the IP will be static IP.
- To modify your configuration, use the left arrow (<--) key to remove your input.
- After you set up your IP address, press Enter.
- Press ESC to exit the program.
- Use left and right arrow keys to confirm or cancel IP settings.
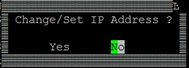
- If yes, re-enter the default password.

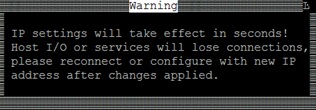
- A pop-up message appears telling you that the change may take effect after a few seconds.
- Use left and right arrow keys to confirm or cancel IP settings.
Created Date: 05/24/2017